Showing posts with label organising wardrobe. Show all posts

Wednesday, 5 March 2014

My Top 5 Tips for Effective Decluttering

As promised previously in my Top 5 tips for effective storage, today I bring you my Top 5 tips for decluttering. Remember my definition of why clutter exists in the first place?

clutter, declutterer, de-clutterer, professional organiser, organising clothes


Therefore - in order to DEclutter, we need to address the decision AND action parts to make progress.

#1 Have a vision


Clearly define your end goal and desired result, so that you can go back to that vision to refocus and boost your motivation to push on. What are you trying to achieve by decluttering? Reduce stress, create more space, save time and energy spent looking for things, improve your performance and efficiency at work? Without knowing WHY you are doing this, it can quickly start to feel too much like hard work.

#2 Have a plan


As with most things in life, before you jump in to a decluttering project you need to have a plan. Decide what, where and when you are decluttering, and only work on ONE area at a time. Dedicate some time to decluttering in your schedule, otherwise it will always slip to the bottom of the To Do list and never get done.

#3 Prepare for the task at hand


If your floor is covered in clothes, or your desk covered in papers, clear the area first without sorting. Place all the stuff in a big bag or box, and then clean the surface below. Give the floor a good vacuum, your wardrobe shelves a good wipe, or your desk a good polish. Now you can start preparing for the next step by equipping yourself appropriately. If you’re doing your home office, have a recycling bin and shredder handy, and some sticky notes to label things for filing. If you’re doing your wardrobe, plan where the excess clothes are going before you create a big pile of stuff on the floor which you then need to figure out what to do with. Try using reusable shopping bags, plastic storage crates, or cardboard boxes - whatever containers you have available. Have as many as you need for the categories you’re going to sort into, and then label them accordingly. Some suggested categories include: Toss, Recycle, Donate, Sell, Repair, Archive (packing your winter woollies or Christmas decorations away is a form of archiving too), and Place (as in place the item where it belongs).

#4 Make decisions


This is where the real work begins, and it can get quite emotionally and mentally exhausting, so work in chunks of time you feel comfortable with. Work through your bag or box of items, sorting them into the categories you have set up. If you are really struggling to decide what to do with some items, you can allow yourself an ‘Undecided’ box, but when it gets full, make a decision on something else in there before adding another item.
To help with decision-making, think about the following:
- have you used it in the last 12 months
- is it serving its intended purpose, or could it be serving a better purpose elsewhere
- what value is it adding to your life, and is it worth the space it’s taking up
- does it have a home, and if not, is it sensible and possible to make a home for it
- if it’s something awaiting action (eg. an intended craft project), are you going to get it done within the next 6 months

clutter, declutter, de-clutter, decluttering, de-cluttering, organising, clothes


#5 Take action


Now that you've made the decisions, it’s time to take the required action. This is where the wheels often fall off! The secret is to keep the time gap between the decision and the action as small as possible. Take the ‘Donate’ items to the charity shop, list that stuff on eBay, return those borrowed items, and put things back where they belong - preferably within 24 hours. If that's not possible, set reasonable time limits and have a plan B in case you don’t meet them. You HAVE to take action though, otherwise it just slips back into the category of clutter – lacking decisive action. Remember you can check out the Resources page on my website if you would like to know what to do with the items you have decluttered.


Much like diet and exercise, once you have achieved your goal you still need to constantly work on it to keep it up. Going through a decluttering process like this is just the beginning of the process. Next month I will share my tips on how to maintain your newly decluttered state.
If you have any questions on decluttering (or what to do with the items) which I haven't covered here, I would love to hear from you!

Friday, 6 December 2013

My Top 5 Tips for Effective Storage

So many of my clients have an issue with storage, and more specifically knowing how to use it efficiently, so today I'll be sharing some basic principals for maximising the usefulness and accessibility of storage spaces - whether you have plenty of them or hardly any.
(If your problem is having too much stuff to fit into your storage space - then tune in next month for my top tips on decluttering!)

Top 5 Tips for Effective Storage


1. Don't store what you don't need to. Often it is more a case of having too much stuff than not enough storage space. Time to declutter! (more help on this topic in the new year)

2. Categorise your items in terms of how often you need to access them, then store them accordingly.

  • Primary storage is for items you need easy access to on a regular basis - this is space (shelves, drawers etc) which is ideally between knee and eye level, or within easy arm's reach when sitting.
  • Secondary storage is for items you need to access occasionally - top and bottom shelves, the back of deep cupboards, under-bed storage etc.
  • Tertiary storage is for items which you only need to access infrequently, once a year, or on special occasions (archived tax records, snow gear, or Christmas decorations for example) - in the roof or under-house storage, in the shed or garage, or in an offsite storage unit.

3. Store items vertically to avoid piles and improve accessibility, and use your vertical surfaces to free up space on your horizontal surfaces - use vertical mail sorters, and wall-mounted hooks, rails, hanging shelves or baskets; store baking trays and platters vertically; etc.

4. Use labels for easy reference - a quick glance in the pantry or filing cabinet and you can easily see where to put something away or retrieve something from.

5. "A place for everything and everything it its place" - create designated homes for items and return them there when not in use. Use drawer / shelf dividers to delineate zones with specific functions. This helps avoid things being 'dumped' just anywhere, and helps maintain order.


storage solutions, home storage, storage help, better storage, decluttering, organising


This is just the very tip of the storage iceberg, but if you start to implement these tips you will be able to see immediate improvements. Do you have any other tips and tricks for better storage? Feel free to share them in the comments below!

Wednesday, 9 October 2013

101 Uses for Command Hooks

Being a renter, I have always relied on my trusty 3M hooks and picture mounting strips. But then through the wonders of Pinterest I discovered all sorts of creative ways to use them - from storing pot lids to hanging curtain rods, and everything in between, and subsequently I use them a lot with my clients. (Here is a little Professional Organiser's secret...Ssshhhh don't tell anyone I told you! If you are struggling to keep your horizontal surfaces organised - use your vertical surfaces! Hooks, hangers, wall-mounted hanging organisers, etc - piles can't form on vertical surfaces)

I have started my own Pinterest board to collate my findings, and would love you to contribute if you have any more clever ideas. I have no doubt we can find 101 uses! Please comment below telling me how you use Command Hooks and email me photos if you can - I'll pop them on my Pinterest board (crediting the source of course!!)

Pinterest, command hooks, organising with command hooks, 3M hooks
Visit my Pinterest board

How I use 3M Command Hooks 

Two of my biggest irritations at home... 1. rattling blind cords flapping about in the wind when we leave our doors or windows open, and 2. wet cloths hanging over the tap or left on the side of the sink.
Problem solved!!

command hooks, organising with command hooks, 3M hooks, 3M command hooks

Here are some other ways I have used them in my and my clients' homes:

3M command hooks, organising with command hooks, 3M hooks, command hooks, cord organising, pantry organising, bathroom organising

The extra large hooks I used to store extension cords also work wonders for hanging large laundry baskets on the wall above the washing machine or laundry trough - great to get them out of the way and stop wasting valuable surface area in the laundry.

So please get commenting - I can't wait to see how you have put these fabulous little things to use!


* Please note this post is not sponsored by or in any way affiliated with 3M - this is purely my opinion and experience.

Wednesday, 25 September 2013

PRODUCT REVIEW :: Hook-over Hanger - PLUS GIVEAWAY!

I first came across these hangers when I was looking for a solution for one of my clients. Most of you know I strongly believe that every person has a unique organising personality, and one of the most important parts of my job is to help a family full of different personalities find solutions to suit them all. This particular client had a young daughter who thought very differently to the rest of the family, and every attempt the mother made at organising her daughter's cupboard ended the same way - a pile of clothes on the floor and a frustrated young girl, feeling it was easier to find things in a pile than in her cupboard the way her mum had organised it.

I worked with both of them until we found a mutually-agreeable solution, which was to arrange her clothes in outfits. While this was not the most sensible option for the mum, she was more than happy to embrace it knowing that her 7-year old could now manage her wardrobe in a way that made sense to her, which meant no more frustration and no more piles. I then had to find the tools to make this possible - and that's when I found these hook-over hangers.

hookover hanger, hook-over hanger, kids hangers, kids wardrobes, kids clothes, organised wardrobe

What I like about these hangers is that they allow you to see and access both garments individually, while keeping them together in an outfit. If you wanted to access just the skirt for instance, you wouldn't have to reach up under the top or remove it, like you would with many other "outfit hangers" used in clothing stores. It also allows you to turn any regular hangers you have into outfit hangers.

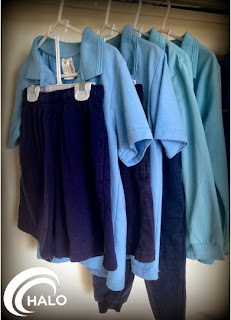
I sent a few to my client to try them out, and they all loved them so much she bought a whole bunch for her other 3 kids too! I also bought some for my son's school uniforms, and they work a treat! It's so easy to see how many days worth of uniforms we have washed and ready to go, and my son can easily grab a pre-assembled combo for the day, or select long pants and a short sleeve shirt if he prefers.

hookover hangers, hook-over hangers, kids hangers, organising kids clothes

And here's the fun bit! I have a pack of 3 hook-over hangers to give away... all you have to do is comment below with your tale of cupboard chaos and why you neeeeed some of these fabulous things :)
If you can't wait, or need way more than 3 to make an impact on your kids' wardrobes, you can buy them in packs of 10 from my website www.homeandlifeorganising.com.au/shop

Get your comments in by next Wednesday 2nd October 2013 - winner will be drawn randomly from all entries, and announced on Thursday 3rd. Good luck!